What will you get in Download folder
We include in the Download-
- Microsoft Excel XLSX file
- Used font and support file.

Step 1. Open/Installation:
After open Microsoft Excel (Please install if you have no one), follow this instruction-
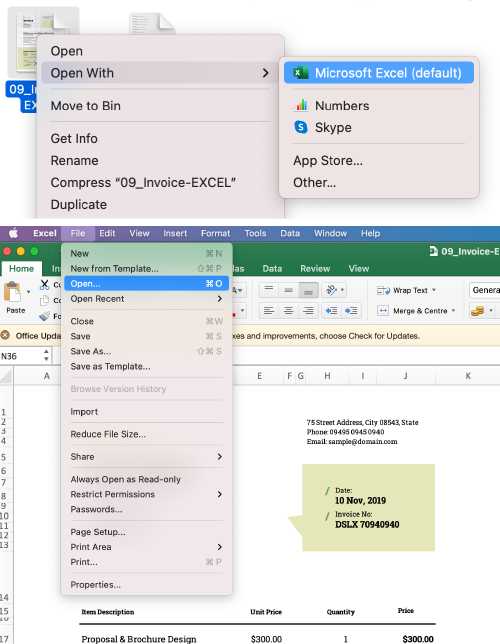
• >File > Open, from the Menu.
• Browse the location and open the downloaded file
Another option or opening the PSD file is to right-click it and select “open with / Adobe Photoshop.”
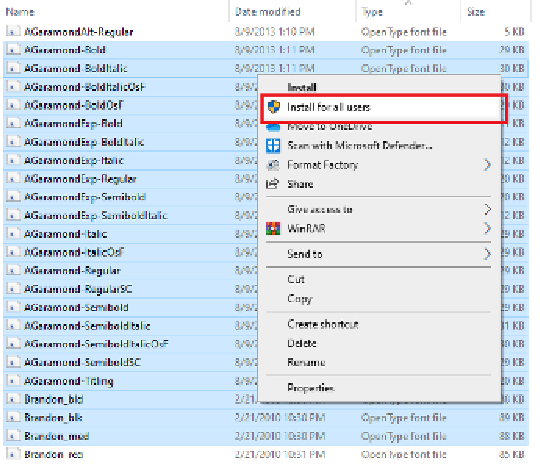
Before open the file, please install required fonts.
Step 2: Install all required fonts
• Download the font files. These are frequently delivered in.zip folders. You may find many variations on the same typeface, such as “light” and “heavy,” in a single.zip folder.
• Unzip the font files if they are zipped by right-clicking the.zip folder and selecting Extract. Now you’ll notice the TrueType and OpenType font files that are available.
Step 3: How to edit invoice template:
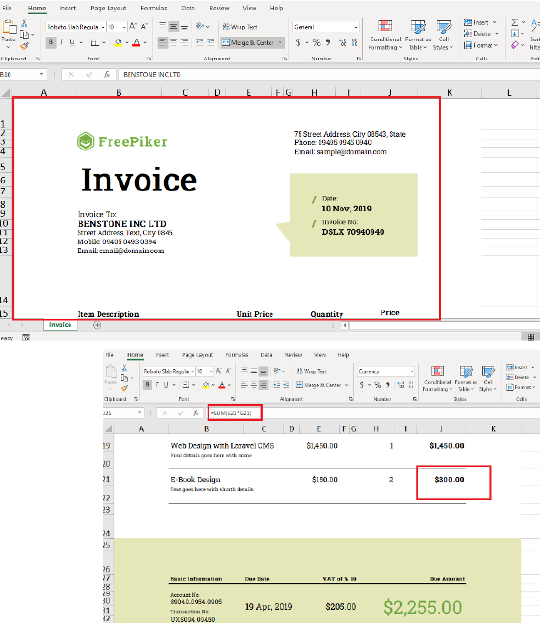
In this template, enter the company name, followed by the amount associated with the goods.
You can add them according to the service provided and should also look at the total amount. The majority of the excel invoice templates make use of formulae to keep your Final Total up to date. Once you have finished updating the invoice, save this template.
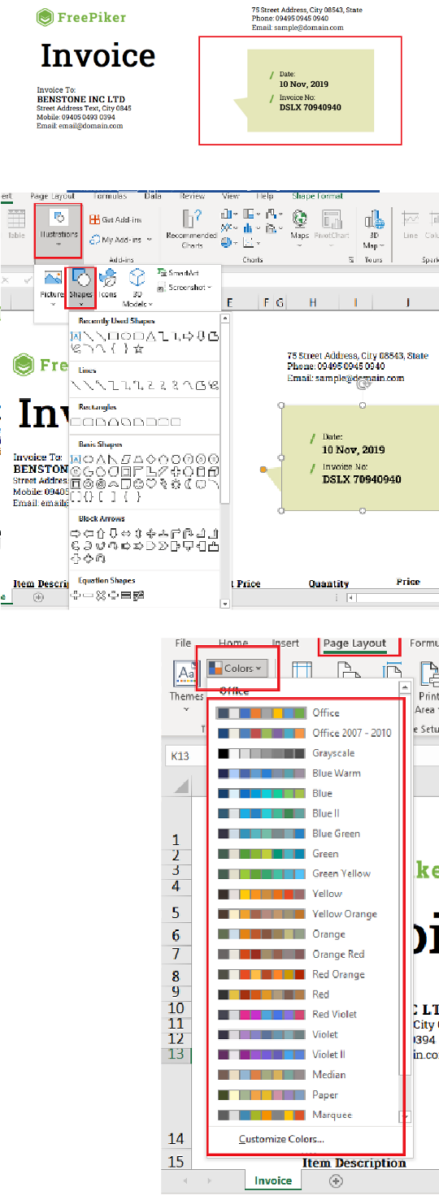
Step 4 : How to edit shape, and colors on excel:
For shape• Click the shape that you want to change. Press and hold Ctrl while clicking the shapes to select multiple shapes.
• Under the Drawing Tools, on the Format tab, click Edit Shape in the Insert Shapes group.
• If you don’t see the Drawing Tools or Format tabs, make sure you select a shape.
• Point to Change Shape, and then click the shape that you desire.
• Click colors and select the color you want from the Page Layout tab in Excel.
• To create your own color theme, click colors on the Page Layout tab in Excel and then click customize colors. Then, click the button near the theme color you want to change and then choose a color under Theme Colors.
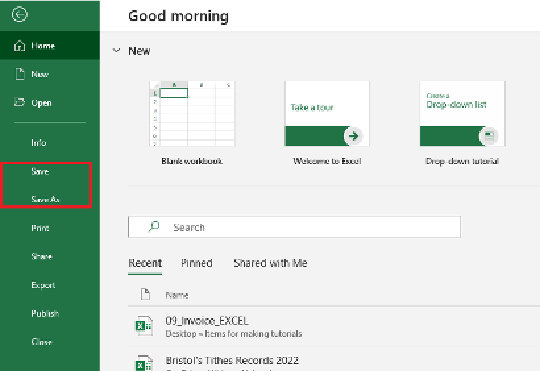
Step 5: Save the template.
From the excel ribbon in the uppermost corner, select the File menu. Select Save As. Enter a suitable name for your invoice and press the Save button.
You can save your invoice in any location in your system and send it this way. This step is critical because if you do not save the updated invoice, you will lose all of your invoice’s updated data.