What will you get in Download folder
We include in the Download-
- InDesign INDD file
- Used font and support file.

Step 1. How to open/install.
I need Adobe InDesign CC to edit this types of template. Please install Adobe InDesign if have no one.
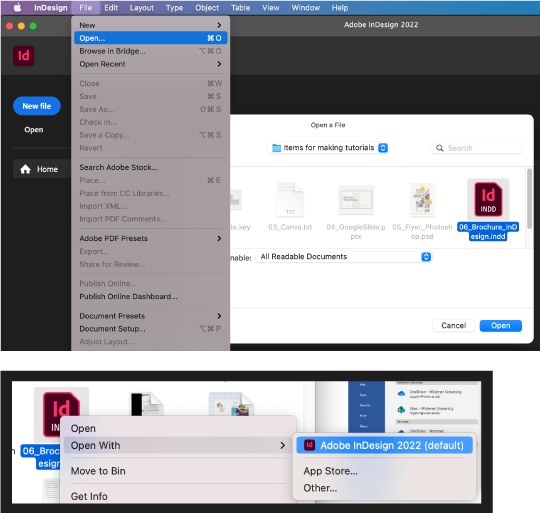
Open the InDesign application, use following steps to open the file.
• Go to Top menu >File >Open (Ctrl/Cmd+ C)
• Browse the file location and Open.
Step 2. Install the required fonts.
Many websites offer free font downloads for personal use. Once you’ve found a font you like,
• Click the Download button to save it to your computer.
• OpenType, TrueType, Type 1, Multiple Master, and Composite fonts are supported by InDesign.
• If the typeface you’re downloading requires you to select a format before downloading, do so.
• If InDesign project is commercial (e.g., commercials, paid publications, revenue-generating websites, social media promotions), you’ll usually need to obtain a license from the font’s designer.

Note: Close Indesign: If you haven’t already done so, save your work in InDesign and close the application before installing the font.
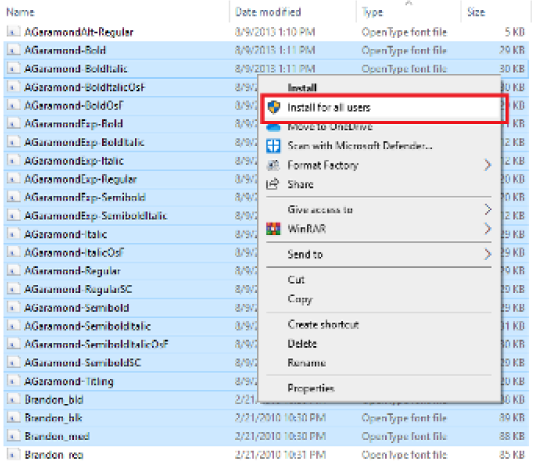
• Select File Explorer from the Start Image titled Windowsstart.png menu by right-clicking it. This launches the file browser on your computer.
• Go to the folder where your font was downloaded. By default, downloaded files should be saved to the Downloads folder. If the file you downloaded is compressed (typically with a.zip extension), right-click it, select Extract All, and then click Extract. This will either unpack the fonts in a folder or only the individual font files.
Step 3: Edit Master Page
• To see the layout, open the Pages panel.
• Go to Windows > Pages if you don’t already have it open. The file has a cover, a back cover, and inside pages.
• The top of the Pages screen will display all of the masters. Every page of your document is listed below the master pages.
• The None and A-Master pages are located at the top of the panel. Then, beneath the spacer, all of your document’s pages show as spreads.
• Double-click the A-Master in the Pages panel to make changes. (Look at the bottom of the InDesign window to see which page you’re updating, master or otherwise.) In the drop-down page picker, you’ll see the page’s name or number.

How to create a new Mater Page.
You’ll need numerous master pages if you wish to create a document that reuses multiple layouts.
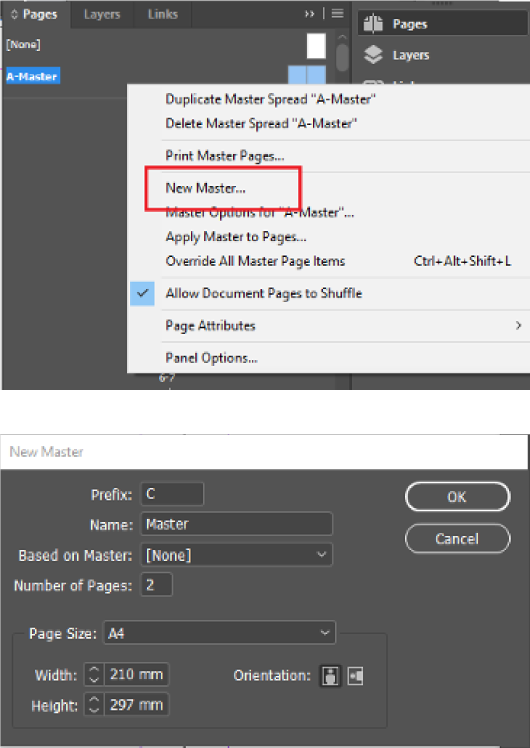
• Right-click somewhere in the list of existing master pages in the Pages panel to create a new master page.
• Choose New Master.
• Choose a Prefix and a Name for the new master page in the New Master dialog box. Then decide on the number of pages and page size for this new master.
• You can also set the new master’s width, height, and orientation.
• Finally, choose OK.
• Add any items you desire to a new master page once it’s been built. Then, by dragging the icon of the new master page onto the icon of the page you want to apply it to, you can apply it to a page in your project. Alternatively, you can right-click on a page in the Pages panel, select Apply Master to Pages, and choose the appropriate master.
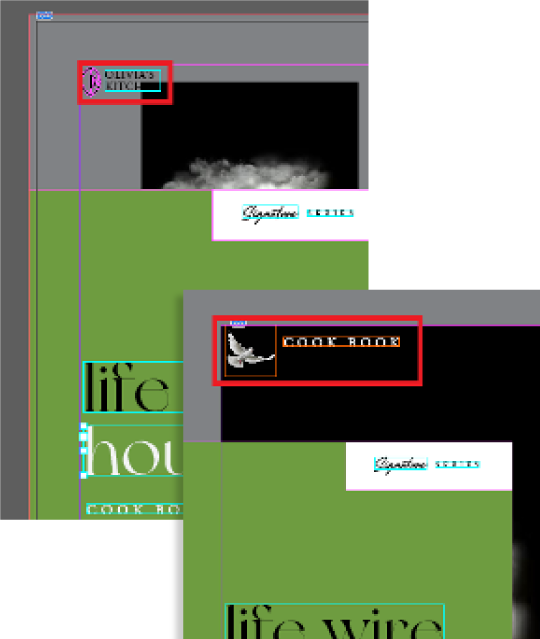
Replace or Change Photos.
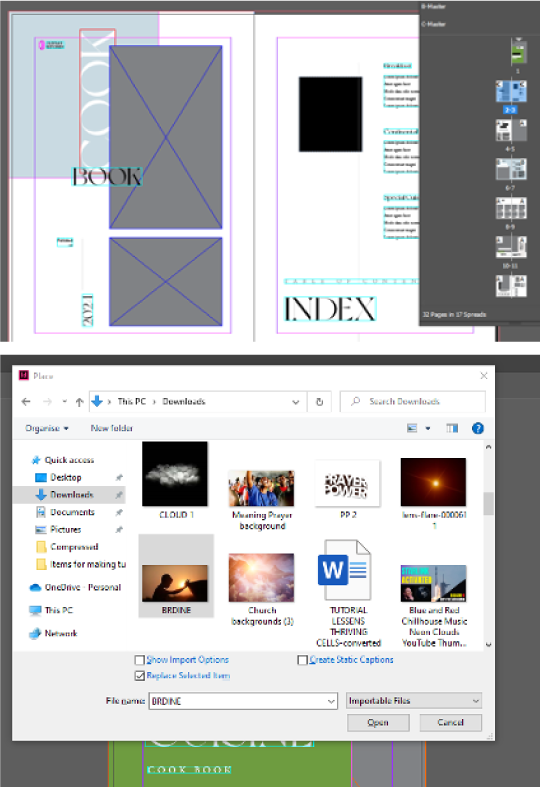
• Begin by adding an image to the cover.
• Go to the top of the page and click on the grey object.
• To insert an image, press Command-D.

• Locate the image you want to place in the Place window. Click the Open button.
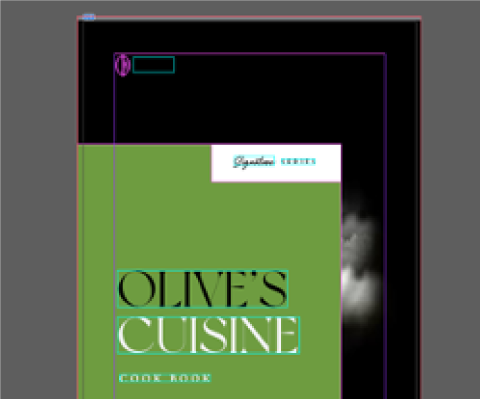
• Use the Direct Selection Tool (A) from the toolbar to resize the image.
• Selecting the image activates a bounding box on the image but within the object.
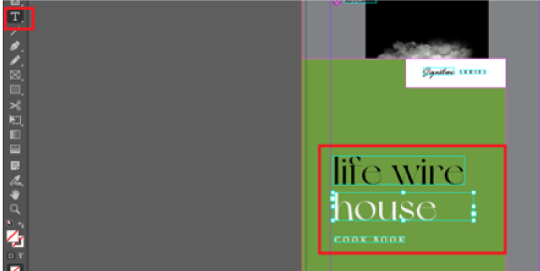
Add/Edit Text
• To change the copy, select the Text Tool (T) from the toolbar.
• Replace the text with your own by clicking on it.
• If you don’t have much text to enter, you can delete a text box by pressing the Backspace key.
• To automatically collapse the box, double-click on the middle handle.
Add/Replace a logo
• If you want to include a logo, make sure you have an.eps or.ai file.
• Remove the logo from the template by selecting it and deleting it.
• To add a new logo, press Command-D. This time, click outside of the page to enlarge it so that it can stand on its own.
• Press Shift-Command and drag one of the corners to resize the logo. The logo will be scaled uniformly by Shift, while the content will be fitted to the box by Command.
• Remove the old logo from the template and replace it with the new one.

Add an Image
Now it’s time to work on the internal pages. To add a picture,
• Select the rectangle at the top of the page and press Command-D.
• Use the Direct Selection Tool (A) from the toolbar to resize the image.
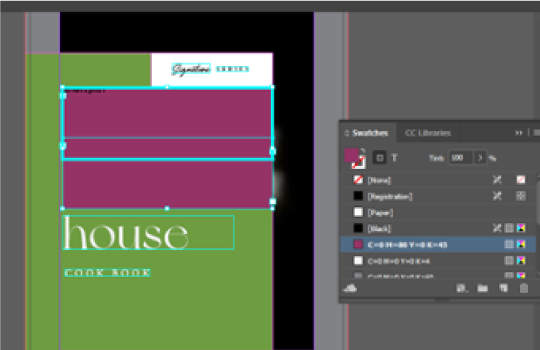
Step 4. Edit the Color
Finally, if you want to make the template more consistent with your branding guidelines, you can change the colors.
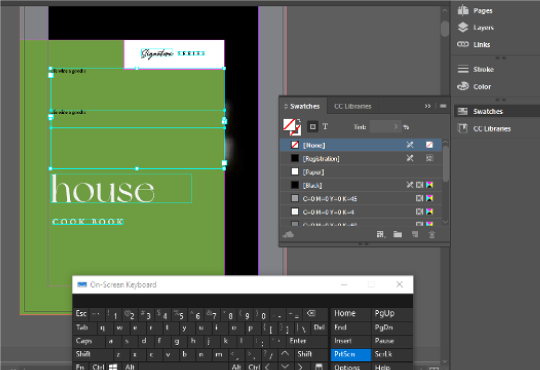
• Go to Window > Color > Swatches to get the Swatches window. If you expand the Swatches window, you’ll see swatches for each of the colors used in the template.
• Select an object on the page to discover what swatch is being used and modify it.
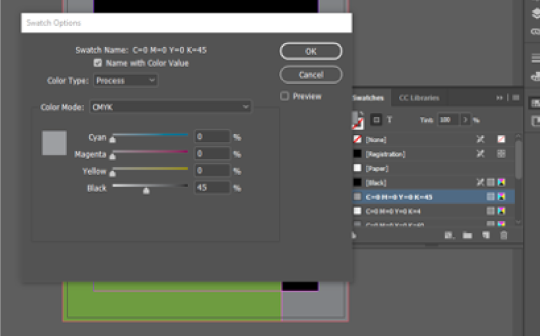
• Double-click on the swatch that has been highlighted.
• Feel free to change the values in the Swatch window to anything that fits your brand.
• Click the OK button.
You can also customize the colors of each text box separately.
• Choose a color from the Swatches window and paste it into a text box.
• You can observe that the color of the facts’ background is lighter than the actual color.
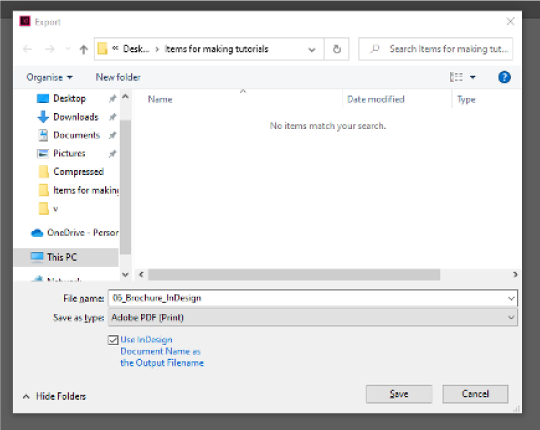
Step 5: Export the file
You can export the file for printing once you’ve finished altering it.
• Check that all of the photographs adhere to the bleed markings.
• Press Command-E to export the file.
• Name your file in the Export window option.
• Choose Adobe PDF as the format (Print).
• Save the file.
• Set the Adobe PDF Preset to Press Quality in the Export Adobe PDF window option. – From the left-hand menu, choose the Marks and Bleeds option.
• Examine all of the printer’s marks and make use of the document bleed settings.
• Click the Export button. You’ll get a PDF that’s ready to print professionally.