What will you get in Download folder
We include in the Download-
- Photoshop PSD file
- Used font and support file.
Step 1. Open/Installation:
After open Adobe photoshop (Please install if you have no one), follow this instruction-
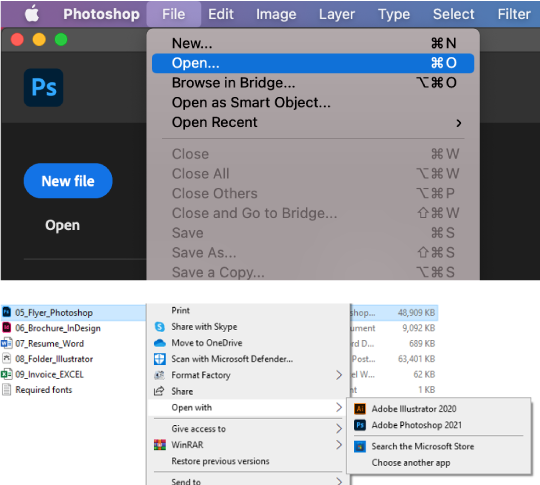
• >File > Open, from the Menu.
• Browse the location and open the downloaded file.
Another option for opening the PSD file is to right-click it and select “open with / Adobe Photoshop.”
Before open the file, please install required fonts.
Step 2: Install all required fonts
• Used fonts download links are included in the Help (PDF/Text) file. Copy them abd Paste on your web browser to download from the source website.
• These are frequently delivered in and .zip folders.Unzip the font files if they are zipped by right-clicking the.zip folder and selecting Extract. Now
• Install fonts by clicking Right-button on your mouse.
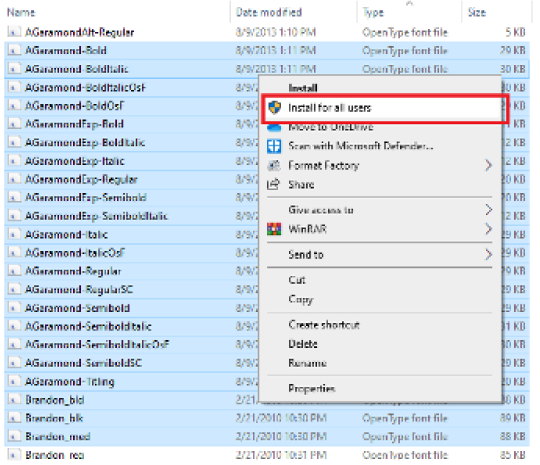
• Right-click the fonts you want to install and select Install.
• Install the font by right-clicking it. If you’re asked if you want to allow the application to make changes to your computer, and you trust the font’s source, click Yes. Your new fonts will be uploaded to Word’s fonts list.
Here are two more methods for installing and managing fonts:
• All fonts are saved in the C: WindowsFonts folder. You can also add fonts to this folder by dragging font files from the extracted files folder. They will be installed automatically by Windows. To see how a typeface looks, open the Fonts folder, right-click the font file, and then select Preview.
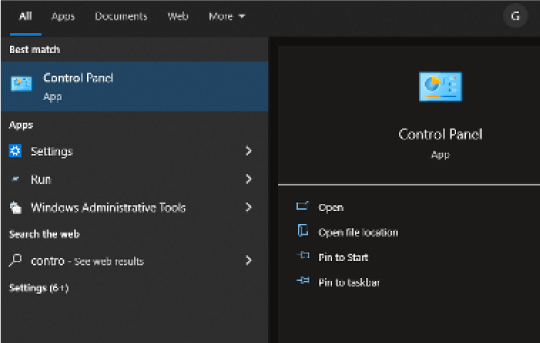
• Control Panel is another way to view your installed fonts.
• Go to Control Panel > Fonts in Windows 7 and Windows 10
Step 3: Once you open a template, edit it as you wish
Note:
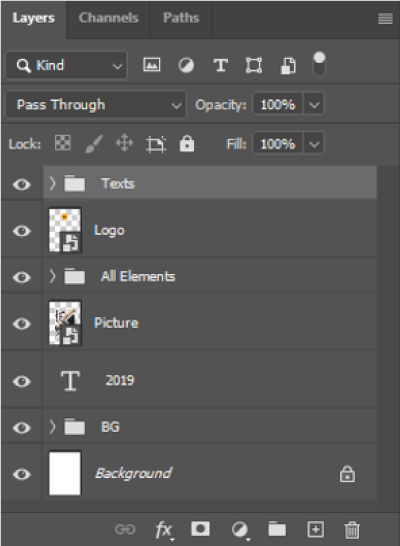
Layer is a major Palette, where you will find all asset including texts, elements, background and all. So, please check the Layers before start to edit. To view Layer palette go to >Window >Layers
• Adobe Photoshop recognizes the PSD file.
• The PSD file will be layered to allow for easy image editing.
• It contains all of the picture sources for your site design.
• You can use Adobe Photoshop to alter the text, image, colors, and even add your own photos to your web design template before saving the optimal image data for the web.
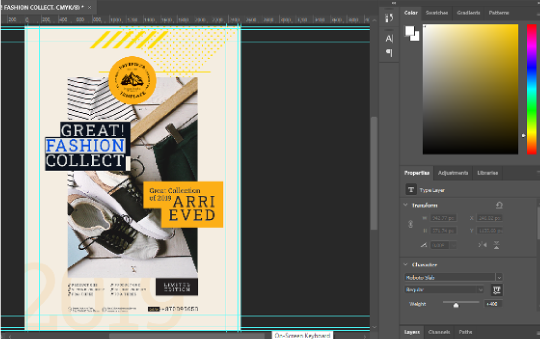
Step 4: Edit text, and color in Adobe Photoshop
Most content text is represented in HTML as plain text for easy editing and for search engines to scan your information. Your web pages need not only valuable content but also perfect and stunning exterior views to achieve the perfect look, attract people, and keep them on your website. As a result, a chunk of the text is displayed in HTML as an image. Adobe Photoshop can be used to edit this text.
To use the tool,
• Hit the “T” key while your PSD source file is already open in Adobe Photoshop.
• Select the text you want to change with the type tool cursor.
• If you get a notification that says “The following fonts are missing…”, it means you haven’t installed all of the fonts you’ll need to edit text.
Keyboard shortcuts
“Shift + Enter” – begin typing on a new line. “Ctrl + Enter” – exit editing mode. “ESC” – delete all changes made during editing.
• Select the text properties you want to edit, such as font family, style, or color, for example. There are dropdown menus for text, alignment, icons, and color in the options panel. This menu allows you to change the font family, style, size, and color. After you’ve finished modifying the text, make sure to update it to match your website’s design.
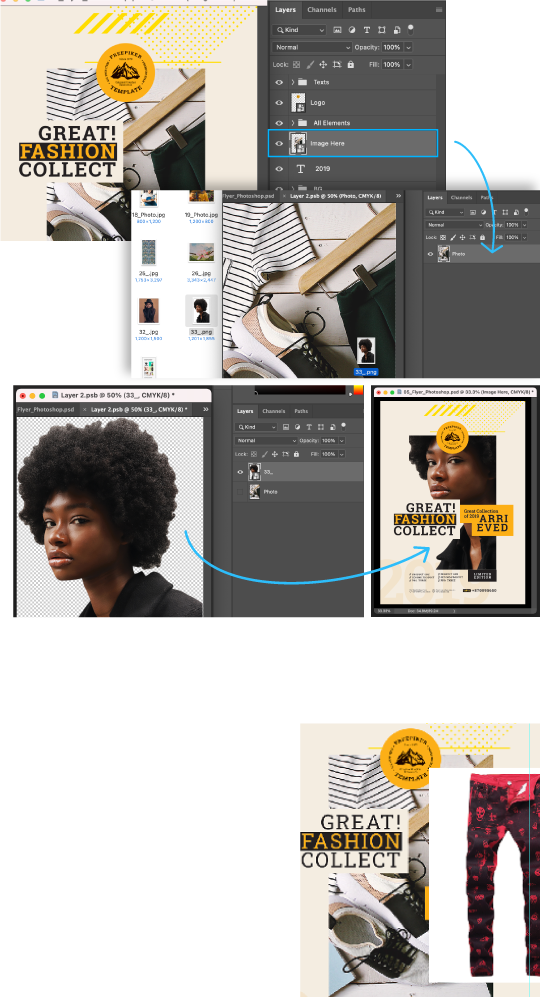
Step 5: Replace/Editing images
Before inserting your image or logo, you can hide the original image. This will make it easier to comprehend the requirements. If you don’t need the images, you can delete them.
Choose “Smart Object Layer” to select the layer.
• The currently chosen layer is highlighted in the layer list.
• Double click on the “Smart Object” to open the layer in a new document.
• Browse your own image and Paste your own image by Drag and Drop in the opened document.
Note:
Hide or Delete existing image if any. To hide a layer, click the “eye” icon to the left of the layer. The layer’s linked image will be removed
• Now save (Ctrl/Cmd+S) and close this document, done!
Also can add new image as separate layer. To add your own image to a PSD file,
• Drag it from your file browser into your Adobe Photoshop window, or use the menu item “File / Open.” Your image will be displayed in a separate Adobe Photoshop window.
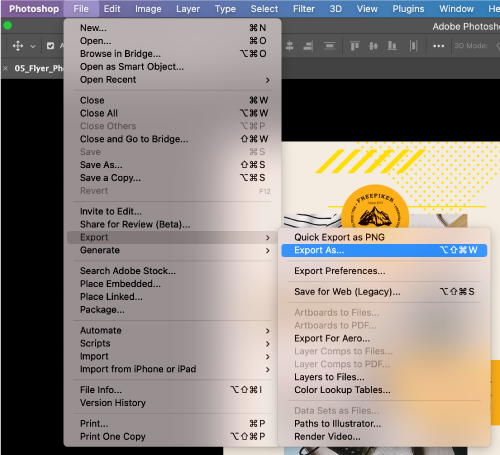
Step 6: Save as Web/Print ready
To get ready for Print or/and Web follow..
• Print
Printable file formats are: PDF, EPS, TIFF and JPG Save as (Ctrl/Cmd+Shift+S) or Export >File >Saves as / Export
• Web
Web usable file formats are: PNG, JPG, and SVG Save as (Ctrl/Cmd+Shift+S) or Export >File >Saves as / Export Also Save for Web is for Legacy version (Ctrl/Cmd+Alt+Shift+S)