What will you get in Download folder
We include in the Download-
• GoogleSlide PPTX file
• Used font and support file.


Step 1. Open/Installation:
GoogleSlide is a product of Google, and uses online. Browse docs.google.com and Sign in with your gmail.
After Logged in GoogleSlide, follow this instruction-
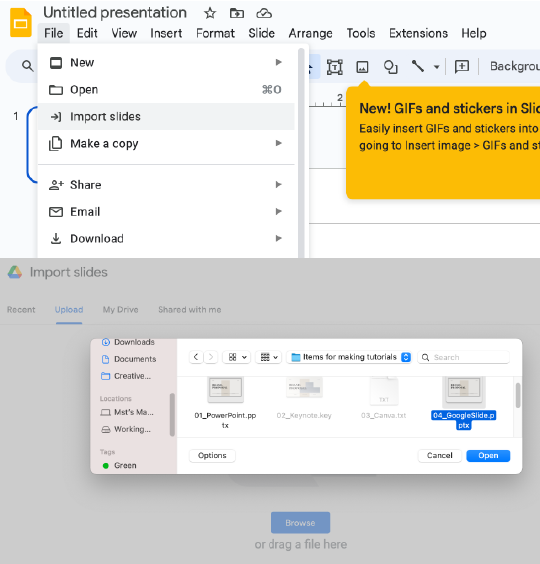
• >File > Import slides, from the Menu.
• Go to >Upload, and Browse the location and open the downloaded file.
• Select all slides or choose some, and Import.
Note:
No need to Install of used fonts, GoogleSlide will connected to Google Fonts.
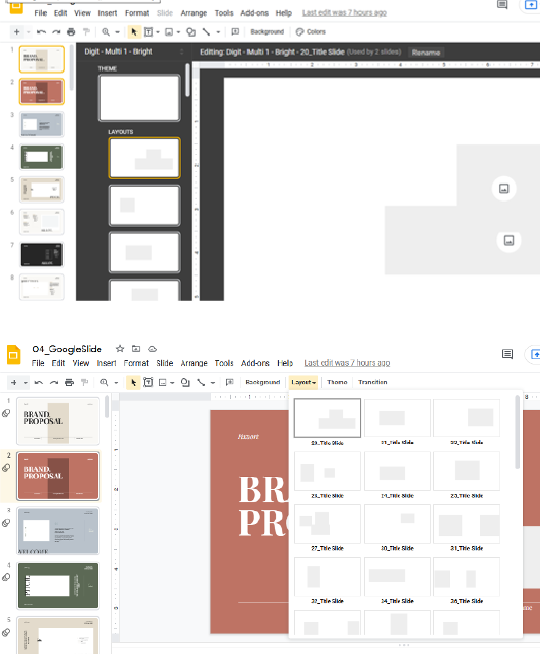
Customizing the layout of your slides
You can update any slide layout in your presentation using the master template editor. It’s simple to make little modifications, such as changing the backdrop visuals, as well as more substantial changes, such as reordering or deleting placeholders. Changes to a slide layout, unlike the master slide, will only affect slides that use that layout in your presentation.
Open the master template editor in a new window. The layout of the currently selected slide will be presented by default when it opens. In the left navigation pane, find and pick the preferred layout. When you choose a layout, you can see how many slides in the presentation are currently utilizing that layout.
Any object can be added, moved, modified, or deleted as needed. We’ll resize the boxes and alter the fill color to blue in our example. When you’re done, click the X in the top-right corner of the pane to close the master template editor.
The update will be reflected in all slides that use that layout. Pictures, unlike PowerPoint, are not included in placeholders, therefore they do not shift when the theme is changed.
Should you go through all of the layouts and make changes? It’s possible that the theme includes layouts that aren’t used in your presentation. Whether you modify all of them or just a few is entirely up to you. You might wish to concentrate solely on the layouts that your presentation already employs. If you plan to add more slides or use your theme in other presentations, however, you should change all layouts to ensure that the design is consistent.
Editing/ Creating a custom master slide
The Master slide: This is the parent slide and comprises two text fields by default: title and body text. This is the most crucial one since whatever you accomplish here will be used throughout the presentation.
You can update the master slide if you wish to make a change to all of the slides in your presentation. We’ll adjust the color of the headline font in our sample.
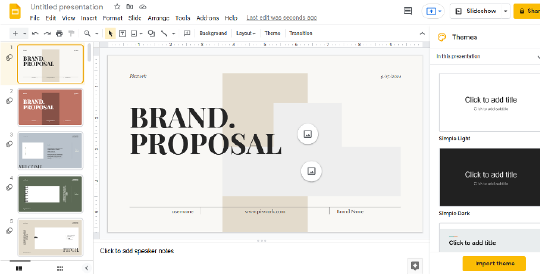
Optional: Select a theme that is similar to the design you want by clicking Theme. We’ll use the Coral theme as an example.
Select Edit master from the Slide menu: The master template editor will be used to edit the presentation. If you don’t choose the master slide at the top, one of the layouts will be used by default.
Make the modifications you want to the master slide. In this example, we’ll change the font color by selecting the edit theme colors icon from the font color command.
The Colors of the Theme pane appear. For this example, we’ll pick Text and background 1 from the drop-down arrow. Then, for Text and Background 1, we’ll choose blue. Then, in the top-right corner, click the X to close the Theme colors pane. When you’re done, click the X in the top-right corner of the pane to close the master template editor.
The modification will be visible on all of the presentation’s slides.